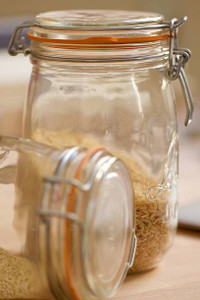
A Guide to Filling Kilner Jars
Posted by The Wares Team on 22nd Jul 2021
We may be in the height of summer, but we're already turning our minds to preserving season! It's such a wonderful treat to make homemade jams, preserves and chutneys from summer fruits and vegetables, especially if you've been lucky enough to grow your own or to get hold of a glut from an allotment-owning neighbour!
We always see a peak in demand for Kilner Jars at this time of year as our customers stock up in preparation for the busy preserving season ahead. But if you are new to making jams, jellies, preserves and chutneys, how do you fill a Kilner jar exactly?
1. Sterilise your Kilner jar
This is vital, as a non-sterilised jar can spoil the entire contents of your jam and encourage it to grow mould. When you sterilise it, you remove all kinds of mould, fungi, yeasts bacteria and other organisms so that the contents remain fresh. The best method tends to be with a water bath.
Firstly, check the bottles and jars carefully to ensure that there are no chips, breaks or cracks. If there are, stock up on your replacements from our range! You must discard any broken jars as they can crack and shatter when hot recipes are poured into them, so place them into your recycling bin.
Then, prepare to sterilise everything that you will use in your recipe - jars, lids, seals and bottles - but do so just before the filling process as they'll need to remain warm as you pour your jam in. To use a water bath, remove the rubber seals or lids and put a heat-resistant plate into your preserving pan, upside down, with the jars resting on top. Add cold water to cover the jars and boil them, maintaining the temperature for ten minutes. Turn off the heat, cover the pan and let the jars slowly cool down. Don't ever risk pouring boiling water into your bottles or jars in a bid to sterilise them, or they may simply crack.
A tip for success is to sterilise more jars than you think you'll need so that you aren't caught short!
2. Make your preserves
This is the fun bit - but read the recipe twice before you begin so that you can be sure you have everything to hand. You'll need to concentrate and follow the steps carefully to get good results and you'll need equipment such as a thermometer. If you're new to making jam, it can be worth making a small batch to begin with and then scale up as you grow in confidence.
An easy blackcurrant jam is a good starter project. Add 600g of clean blackcurrants to 100ml of water, and bring to a slow simmer for five minutes until the fruit breaks down. Let it cool a little and then strain it if you prefer a jelly. Then add 400g of sugar to each 500g of fruit pulp. Pour in the juice of half a lemon, and then rapidly boil the mix for around ten minutes until it reaches 105C on your cooking thermometer. Let it cool a little and gently press the surface to see if a little wrinkle forms. If it does, stir the mix and prepare to fill your jars!
3. Fill your jar
When your recipe is complete, then you'll need to gently remove your sterilised Kilner jars from the vessel that you've used to pre-warm them. If there is any water inside the jars, just tip it away. You'll need oven gloves or a jar tong for protection as the jars will be hot!
Then, put the Kilner jars onto a heatproof surface, such as a chopping board or your hob top. If you're using a funnel, you'll find this makes it a lot easier to fill your Kilner jar. Place the stem of the funnel into the Kilner jar and then use a ladle to transfer your delicious preserve from the pan to the jars. Your recipe will give you an indicator as to how high you should fill your jar - and the size that you should use - so refer to it carefully.
Pour the mix in very carefully and slowly with your funnel and have a towel handy to clean up any spills. If there are any air bubbles in the jar, then use a non-metallic spatula to remove them, by carefully running the spatula inside the jar, along the inside of the glass. Your final step is then just to wipe the rim and the threads of the jar lid to remove any spillages, and then secure the lid of your jar carefully, with a jam disc as necessary. Add a label to the exterior of the glass to remind yourself what the contents are and when you made it!
Stock up at Wares
See our latest Kilner jars now online and get a great price, rapid delivery and superb service when you choose to experience the Wares of Knutsford difference today.

